
Here is what the tutorial is for.. a little pouch thing.. Sherlock inspired!

How To Make A Two Pocket Felt Pouch/Wallet/Clutch/Thing
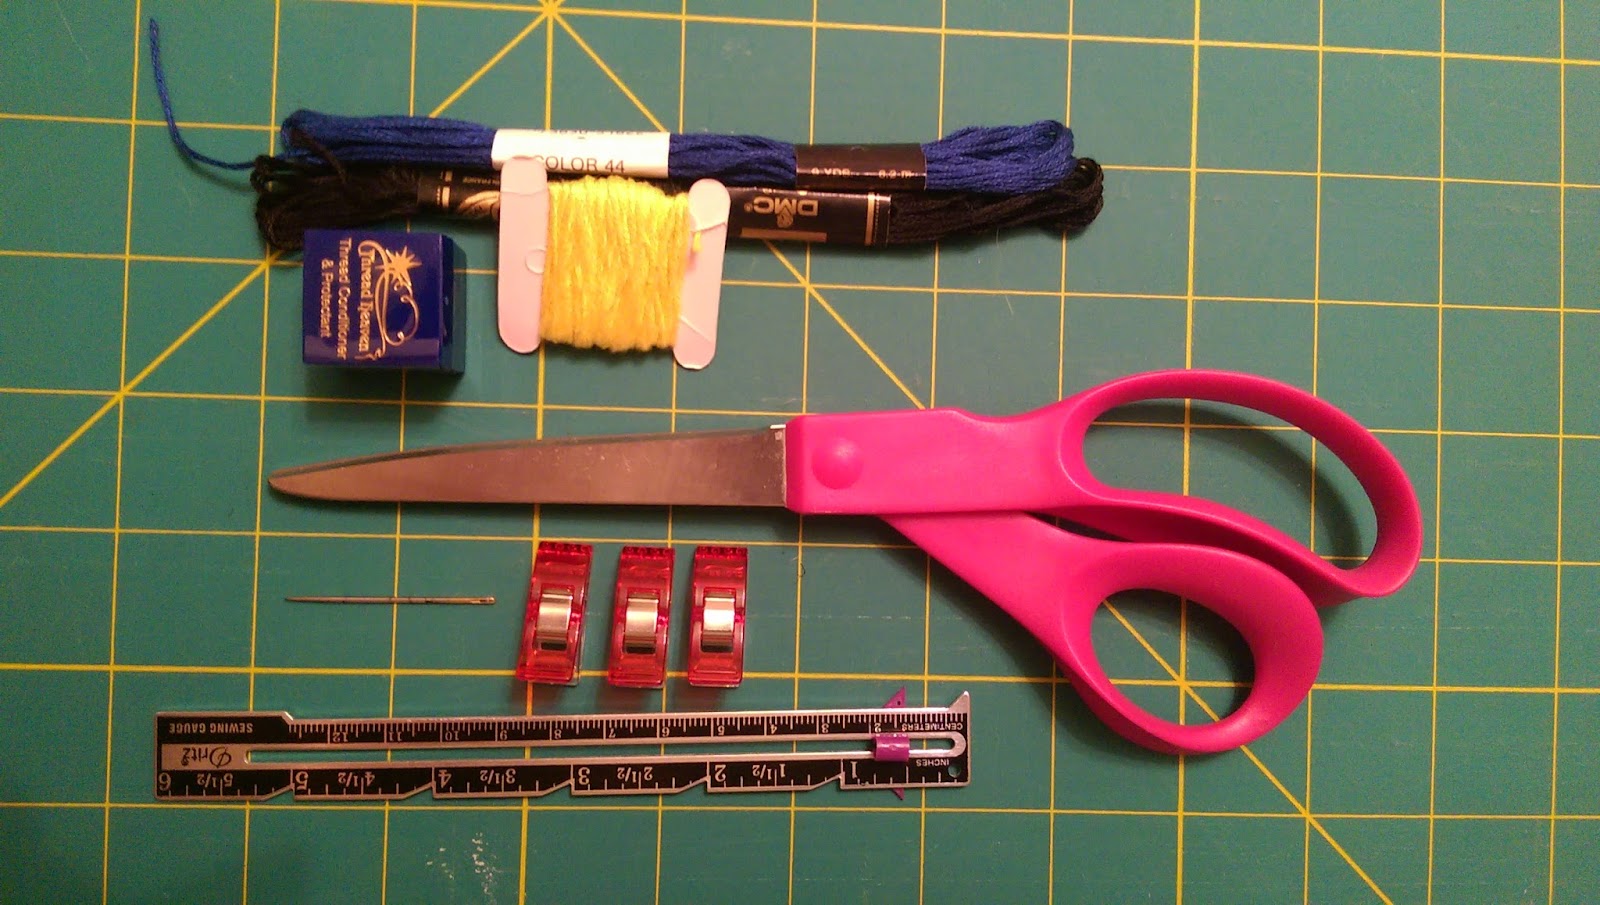
Items Needed:
(* means not pictured)
- embroidery thread in desired colors (at least one color for edging, about 70” + more for sewing on snaps
- snaps or velcro*
- needle with eye big enough for thread. I used one from about 50 years ago, but quilting needles are generally too small. I recommend getting one from the embroidery section of the store)
- scissors
- ruler (optional)
- wax for thread to help keep tangles from forming, optional but can be found here
Directions:
First of all, please know this is by no means a hard project and in know way requires perfection. It could be as fancy or as simple as you desire.
- Decorate as desired.
Here I was going for a Sherlock inspired look so I chose to do a smiley face with yellow embroidery thread. I used a split stitch to stitch it onto the patterned felt only. You could applique, iron on, or do any other sort of decoration you desire. There are also so many colors and patterns now of felt that you could really have endless options!
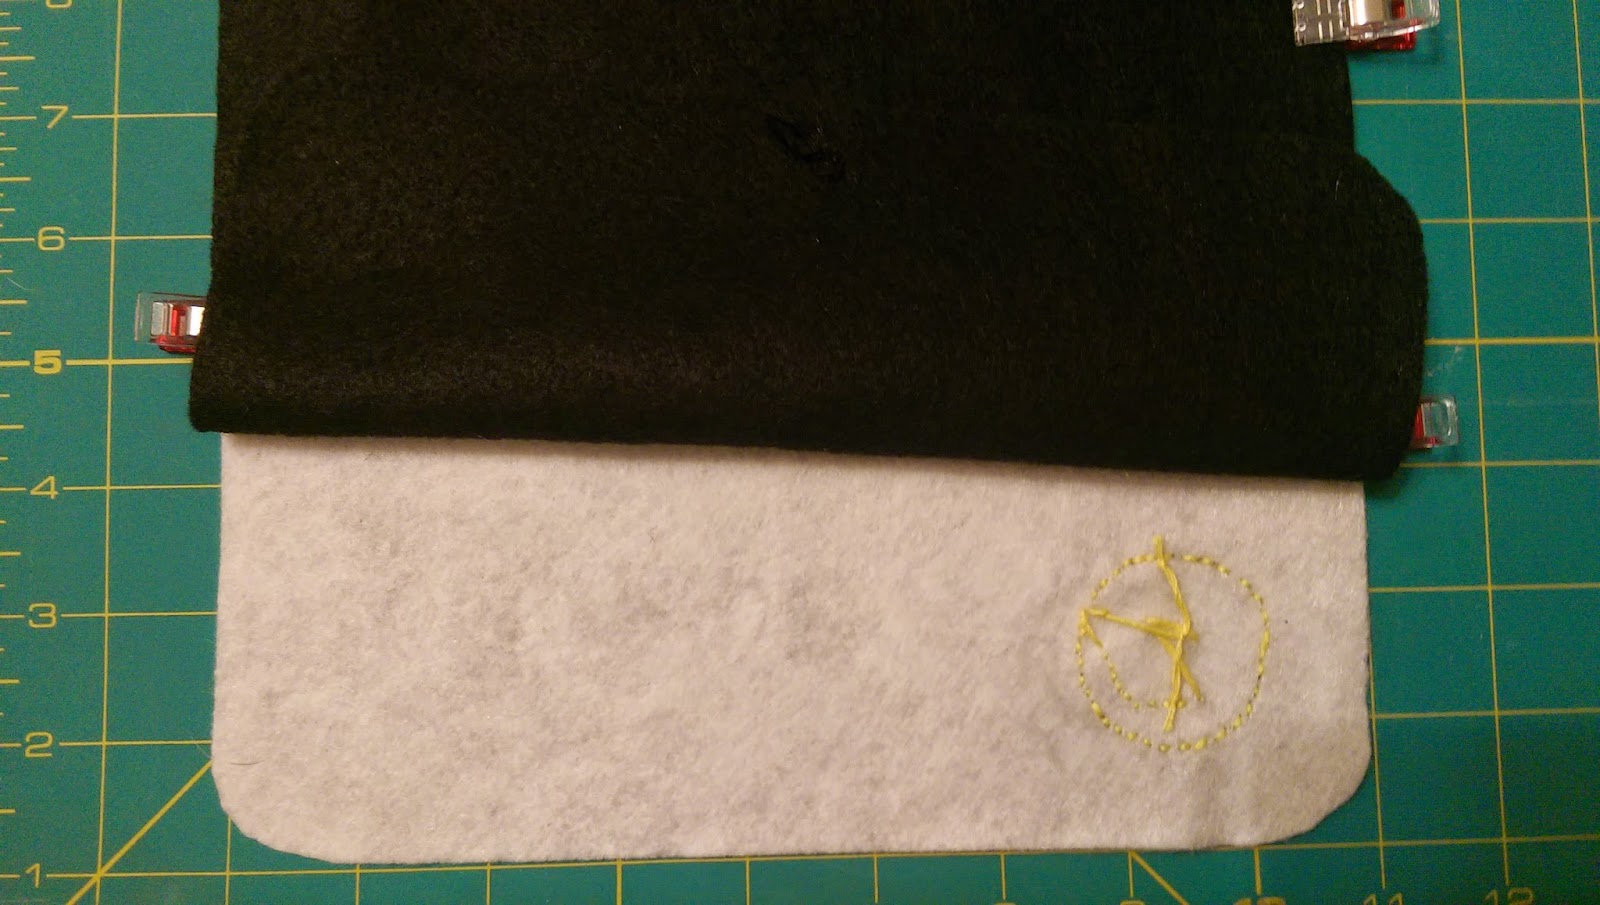
Here is the embroidery from the back, a bit messy, but hey- it’s my first time doing split stitch.. seriously, anyone can make this!
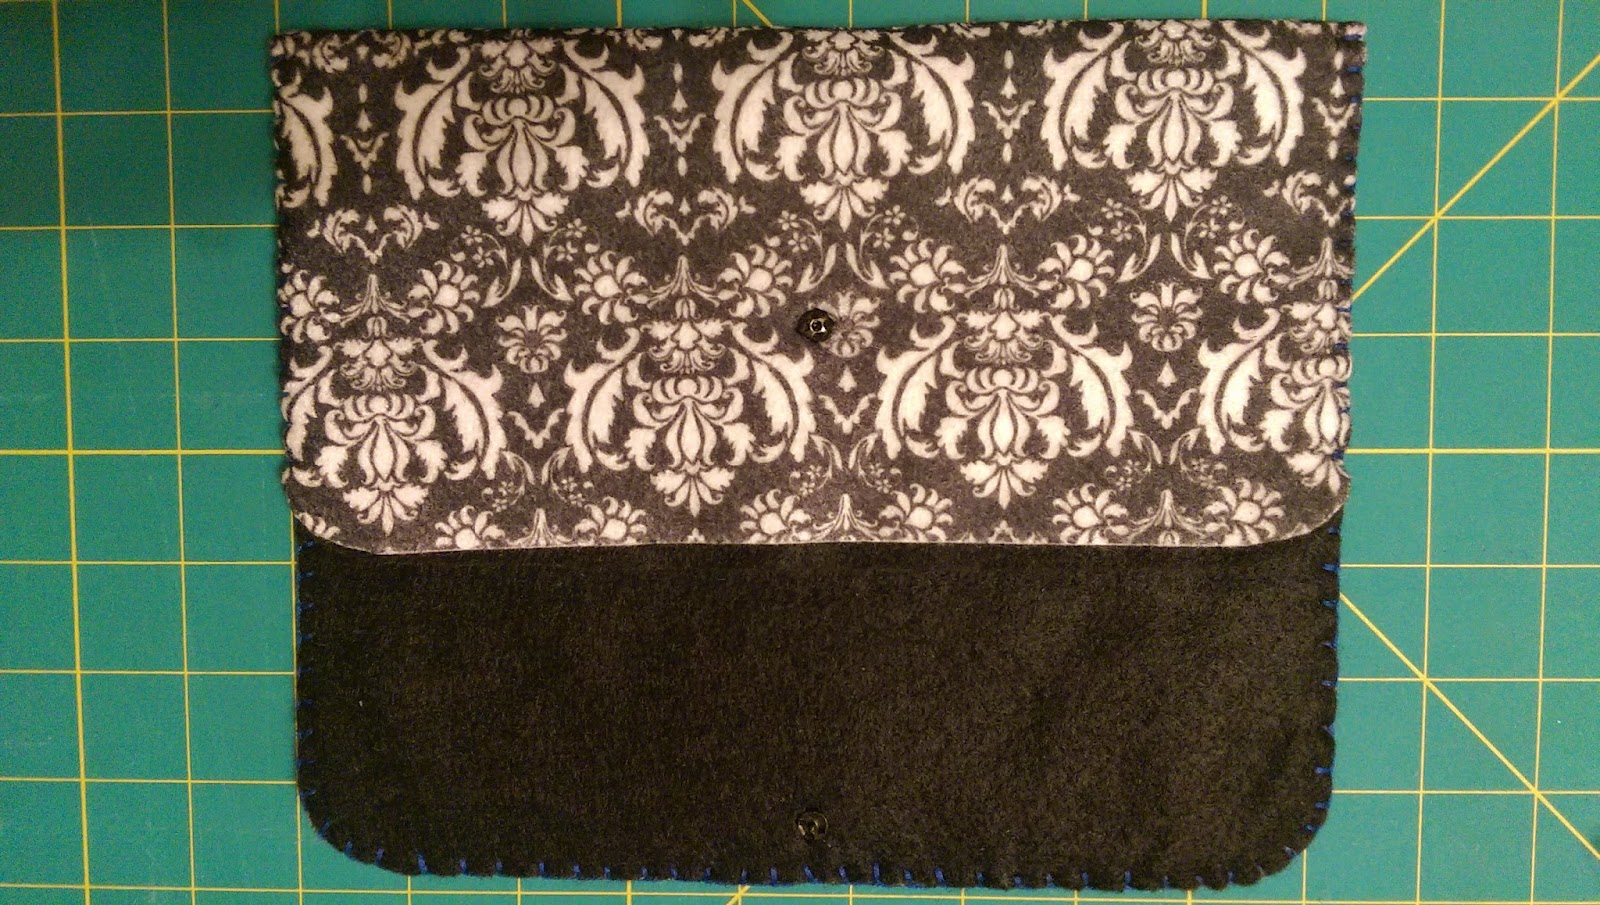
- Sew the top snap onto the top of the flap.
I sew the snap about half an inch down, centered along the top of the inside felt. Go through each hole twice and knot in between the layers.
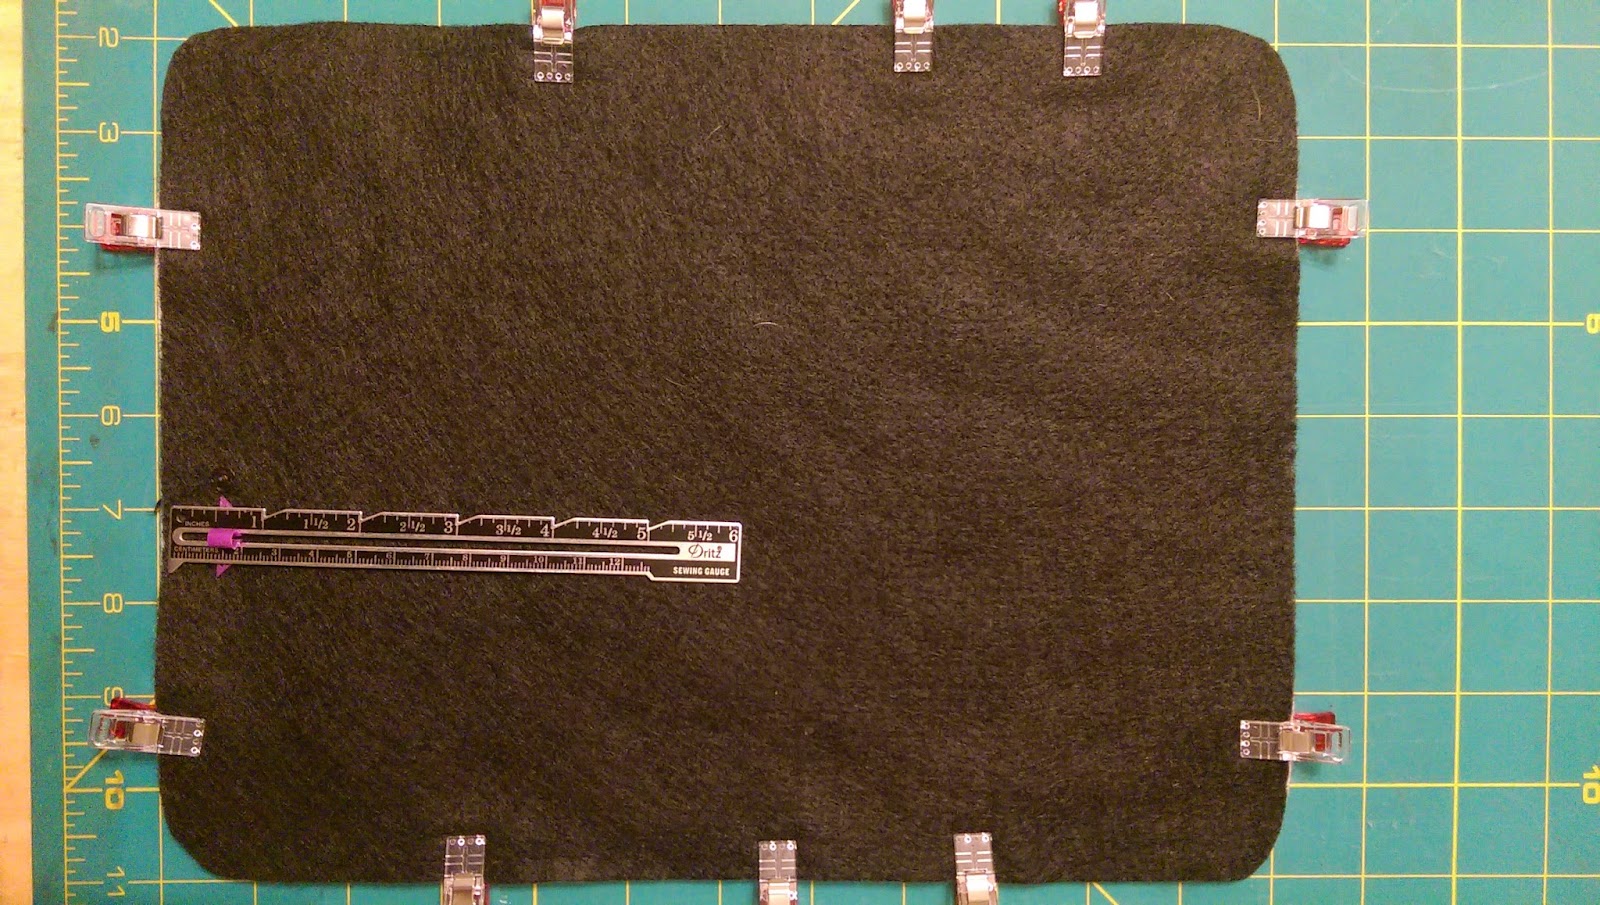
- If you haven’t yet, secure the two layers together with clips. Make sure they are flat. It is more important that the top edges are lined up then the bottom. As you fold it over, the bottom edges will become uneven with one another, this is okay.
I find it easiest to secure the entire thing laying flat then fold it over and re-secure the pouch area. Fold the pouch area up about 4.5”

- Start at the bottom corner and work your way around the whole pouch, blanket stitching the sides together. This may seem tricky if you have never blanket stitched before, but by the end you will feel like a pro. Everyone learns stitches differently so just google how to do this one. But mostly, its just going through all the layers and pulling the thread under itself before going back in again. And seriously, it does not have to be perfect. In shifts and wiggles around as you use it and all sort of blends in. I like to go in at the bottom right corner, tucking the knot inside, and finishing it the same way one the other side is reached. Around the area where the pockets end, I like to throw in a couple extra close stitches to keep it secure.
Finish the edges by knotting and coming up through the inside of the pouch.
- Add the final snap.It helps to put a little bit of chalk on the top snap and closing it to make a little chalk dot to know where to sew the bottom snap on. Sew it only to the top felt piece so that you have two pockets inside.
- Enjoy your handy little pouch! I have used them for coupons, make up, pencils, glasses, phone.. pretty much anything as they are surprisingly sturdy!
Thanks for sticking around and checking it out! I hope it was all clear, but feel free to ask questions. :) -T
p.s. if you dont want to make one yourself, head on over to my etsy store..they are ready for shipping.. yay!
p.s. if you dont want to make one yourself, head on over to my etsy store..they are ready for shipping.. yay!